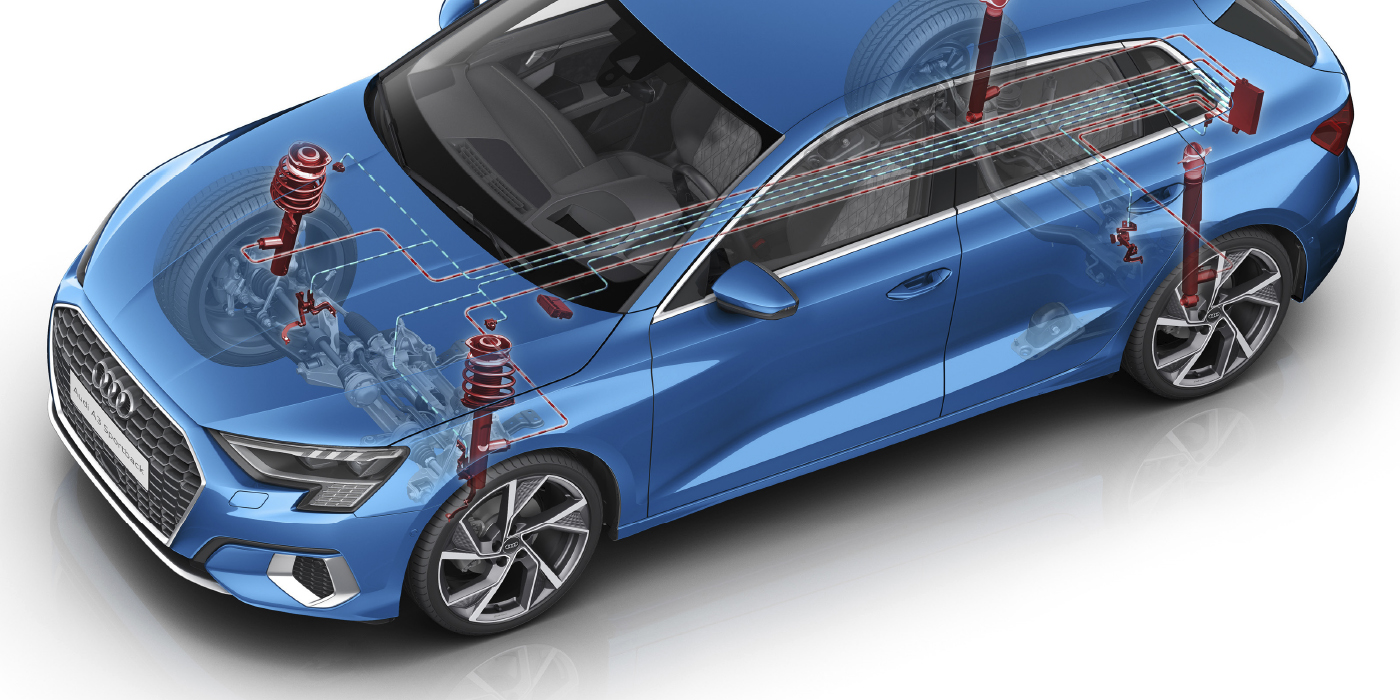
The most challenging concept to understand is that almost every ADAS sensor does not have moving parts inside. Cameras are set at the factory for focus and field of view. Radar sensors have a very specific beam pattern that can’t be changed.
Sensors do not change their aim or pattern on their own. Impact with other objects can change the calibration of the sensor, or the installation of a new sensor will require calibration.
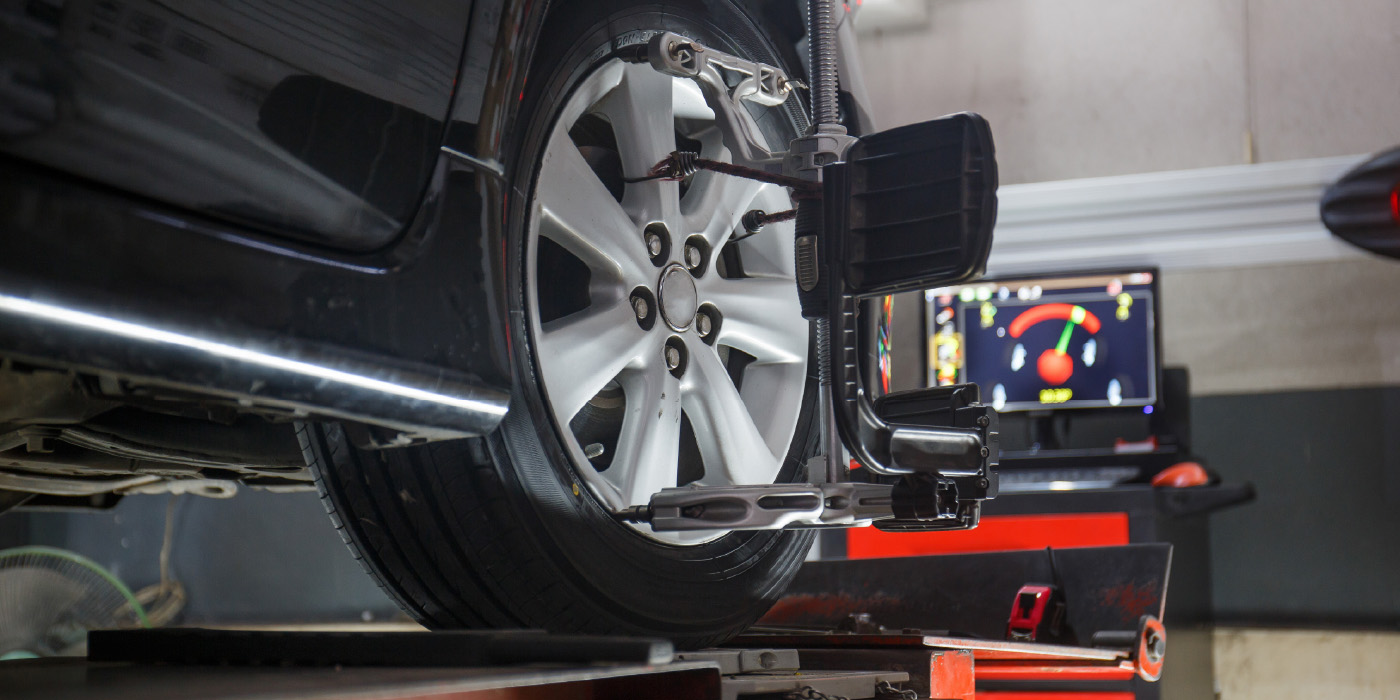
Calibration adjustments can involve tuning the field of view of the camera or radar using scan tool. Think of it as adjusting blinders on a horse. If the sensor needs further adjustments, it might involve adjusting the sensor mounts on the vehicle.
Known-Goods
When you go to the eye doctor, they will ask you to read the letters on a chart. ADAS calibrations are similar. A calibration procedure typically uses a target with a specific pattern, shape or even thickness. The target is set at a specific distance, angle and orientation from a measured point on the vehicle.
The vehicle knows what a known-good target or fixture should look or sound like because it was programmed into the system at the factory. The scan tool activates this “memory” from its birthday, so it can compare and possibly adjust internally or externally.
The majority of forward-facing cameras can’t mechanically change their point of view. The focus and field of view are set at the factory, and there are typically no moving parts. For example, no motors are moving the zoom or the angle of the camera. Instead, corrections are made with software that can “crop” in on the correct field of view and the vehicle’s centerline. Think of the camera lens as a wide-angle, but the software uses it as a telephoto.
RADAR SENSORS
Radar sensors emit radio waves that bounce off of objects and are received by the sensor. These types of sensors can detect objects and vehicles no matter the lighting conditions.
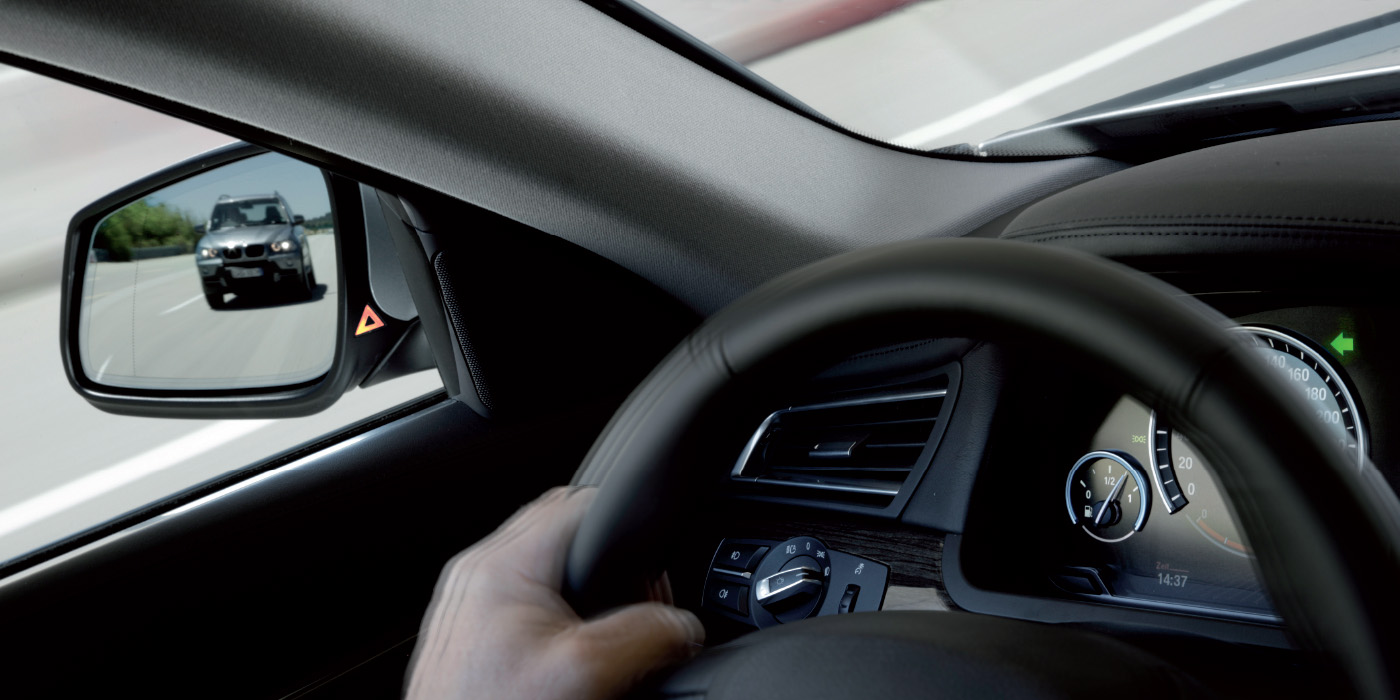
There are two types of radar: long-range and mid-range. Long-range sensors are used to measure the presence, distance and even speed in the narrow cone. This type of radar is called millimeter-wave radar by some manufacturers. Long-range sensors can measure up to 600 feet in front of the vehicle. Mid-range can detect objects 200 feet from the vehicle. But mid-range radar sensors measure objects that are only in near proximity to the vehicle. These radar sensors can be used for blind spot and cross-traffic detection.
Calibration of radar sensors typically involves adjusting their position. Long-range sensors generally are mounted above or below the front bumper. Mid-range sensors can be mounted behind bumper covers, roof pillars and the corners of the vehicle.
The position of a long-range radar sensor can be moved using adjustment screws behind the sensor to adjust direction and elevation. This type of adjustment is typically required if the sensor has been replaced or disturbed.
CALIBRATION
The ADAS module assumes that the target is positioned correctly when the scan tool initiates the calibration mode. The system trusts that you took the time to set up the targets with some degree of accuracy. It compares the factory settings to the actual values and uses this information to make adjustments. If the required adjustment is outside of the parameters, a mechanical adjustment to the sensor will then have to be made to the mount or adjusters, if you are lucky.
When you set up a target or fixture for a camera or radar, the position and distance from the vehicle is critical to the performance and operation of the system. If the target or fixture is a few millimeters off when placed a few meters from the sensor, it can change the alignment of the sensor by meters when it is pointed down the road or the height of the vehicle in the blind spot.
When performing a calibration of any ADAS sensor, the best skills to improve are reading skills and attention to detail. If you are a technician who rapidly clicks pop-up windows or never reads the directions, you will fail miserably at ADAS calibrations. Take your time and follow the prompts to the letter.