 It has been a long drive to the lake. The driver carefully backs the trailer down the boat ramp. As the axles hit the water, the hot wheel bearing hubs hit the water simultaneously. As the bearings’ heat is quenched by the lake water on the outside of the hub, the rapidly contracting air and lubricants inside the hub create a vacuum. If this vacuum can’t be held by the seals, the hub will suck in water and contaminants.
While this is an extreme example, this type of contamination can happen to all bearings if the seals are not in good condition. It is clear to see, the most important part of bearings is the seal. If contaminants are able to work their way onto the contact surfaces, or the lubricant is expelled, the bearing will not last long.
Seal Materials
Some newer seals are fabricated using hydrogenated nitrile butyl rubber. The manufacturer claims that the material is impervious to attack and degradation by synthetic fluids and additives that can attack conventional nitrile compounds. In addition, the material has a high resistance to abrasives that can become embedded in other compounds, thus causing leakage.
 Design
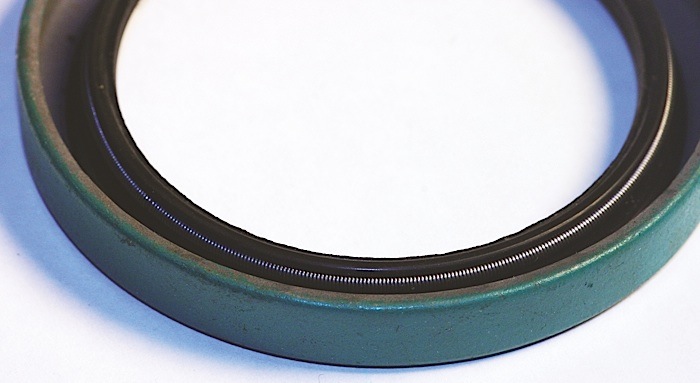
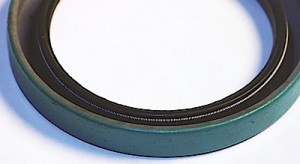
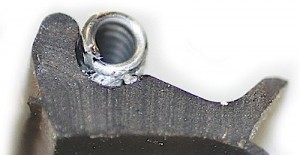
Most seals today are termed “lip seals,” as they have a lip that rides against the outside diameter of a shaft. This “rubber” (nitrile, polyacrylate, silicone, etc.) lip is bonded to a metal shell that fits into the bore of the component to be sealed. A garter spring fits in a groove behind the lip to help the lip maintain contact with the shaft. Sometimes you’ll find a bead of sealer around the outside diameter of the shell to help seal the metal shell to the bore in which the seal is installed. In other cases, the metal shell is completely covered with same material from which the lip itself is made.
Some lip seals include their own integral dust seal, which is a small, additional lip facing the outside of the shell. This small lip has no garter spring. Some bearing seal manufacturers are making seals that can have up to three different lips.
Installation
A seal must always be installed so that the sealing lip is facing the fluid to be sealed. This is because the lip is made so that pressure applied to it from the “wet” side of the seal will tend to increase the pressure the lip applies to the shaft. If the seal is installed backwards, pressure acting on the “wrong” side of the lip will cause it to lift from the shaft, resulting in leakage. On most seals, the correct side is obvious; however, on others it is not.
Most seals are designed so that the “back” (side that faces the fluid) of the shell is open. The front is closed and may have a part number embossed on it. However, some seal shells are very symmetrical, and careful attention must be paid to the correct direction of the lip.
Some seals are even designed for a specific rotation. They may have an arrow on them showing the rotation. Directional seals may have small diagonal ridges near the lip. The ridges act as miniature “screw threads” to help divert fluid away from the lip as the shaft turns. Some seals are engineered with a sine wave in the lip resonating a pattern as the shaft turns. This helps squeeze the lip, pump oil away from it, and reduce leakage.
Once the seal is out, check the surfaces of the hub and spindle where the lip rides for damage. If the surface is scored, pitted or otherwise too rough for the new seal, you have several options. Minor scratches or corrosion can often be removed with emery cloth. Nothing more coarse than emery cloth should be used to dress up the surface. Sometimes the lip of a hardened old seal will wear a groove into the sealing surface. If you can catch a fingernail in the groove after polishing the shaft with emery cloth, the groove is too deep and unacceptable.
Replacement of the hub or spindle, whatever it is, could be very expensive, both in terms of the cost of the hub and the labor to replace it.
Check the seal itself to determine the cause of failure. If the seal is hard and/or worn, it’s simply a victim of age. If the lip of the seal is extremely soft and swollen, it may be a victim of non-compatible lubricants.
If the seal is relatively new, it may have been incorrectly installed. Installation failures include torn lips, dents from improper installation tools, misalignment, cocked installation, burr damage and missing garter spring. Careless installation can cause the garter spring to dislodge from its groove. Also, check for signs of heat damage.
Next, make sure you have the correct seal. Check the fit on the shaft and in the housing. Before installing the seal, lubricate the lip with whatever fluid it’s going to work in. If the seal is installed dry, the lip will overheat as soon as the shaft starts turning.
Use a seal installer to tap the new seal in place. If the seal must be installed over a rough part of a shaft (such as splines) to get to where it belongs, wrap masking tape around the rough areas to prevent seal damage. Don’t hammer directly on the seal, and never use a punch or drift to install the seal. Denting of the seal’s shell by the punch can distort the lip and cause the seal to leak. Be sure to start the seal in the bore squarely, and drive it in squarely. Generally, the seal should be tapped in until it is flush. There are some exceptions, so it’s a good idea to check the depth before the old seal is removed.

