A blown head gasket can ruin your day and cost you or a customer a lot of money. Blown head gaskets can be the result of detonation, poor engine cooling, or improper installation. With the help of the gasket experts at Fel-Pro, we’ve identified not one, not six, but 15 ways to prevent head gasket failure. Keep them in mind and you’ll be less likely to find yourself tearing your engine apart in the future.
- Choose the right gasket.
Use the correct head gasket as specified by the OEM. Use the wrong material or construction and you’re well on the way to gasket failure. For example, Fel-Pro offers at least five different types of cylinder head gaskets for small block Chevy, and each has its own purpose:
• Composite: General use on stock engines
• Composite with copper wire ring: Performance applications using aluminum cylinder heads
• Composite with steel wire ring: Performance and street/strip applications; well suited for forced induction engines
• Single-layer embossed steel shim: Commonly used to increase compression ratio and power
• Multi-layer steel (MLS): High-horsepower street or race-only applications; well suited for forced induction engines
Summit Racing’s OnAllCylinders blog posted a basic overview on gasket materials that’s worth reading.
- Handle heads and gaskets properly. Wash your hands before handling cylinder heads and head gaskets. Grease or dirt can end up on the gasket or head surface and prevent a good seal. Also, never set a clean cylinder head on your garage floor, especially on its deck. The weight of the head can cause dirt to stick to the deck.
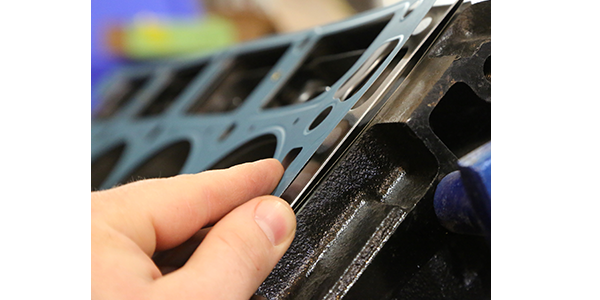
- Check for flatness. Always check cylinder head and block surfaces for flatness. Place a straight edge across the deck(s) and use a feeler gauge to check clearances. Too much clearance means the surface is not flat enough to retain a seal, and you’ll need to have it resurfaced.
- Check for surface flaws. Any pitting, corrosion, cracks, ridges, or low spots on the head or block decks is a potential path for leakage. If you notice any of these flaws, you’ll need to have the head or block resurfaced.
- Clean the deck surfaces. Check the deck surfaces for any old gasket or sealer. Use a gasket remover or surface degreaser and a wire brush to remove any remaining material. For aluminum heads, use a non-metallic scraper to avoid gouging the surface.
- Use sealer only when necessary. Most modern gaskets (with a few exceptions) do not require RTV silicone or other sealers. They can interfere with any factory-applied sealing coatings and cause poor sealing, deterioration, or complete gasket failure. RTV silicone can also ooze out when the head is clamped down and flow into the cooling jackets or combustion chamber(s).
- Don’t use damaged head bolts. Carefully inspect your bolt threads and replace any bolts that have deformed or worn threads. Dirty or damaged threads can give false torque readings and decrease the bolt’s overall clamping force. Be sure to lubricate the underside of your head bolts and washers if used.
- Inspect head bolt holes. Like damaged bolts, bolt holes with deformed threads, dirt, or other residue can reduce clamping force. Unless the manual says otherwise, run a bottoming tap down each bolt hole. The tops of the holes should also be chamfered so the uppermost threads won’t pull above the deck surface when bolts are tightened.
- Don’t reuse old bolts. Many modern vehicles have Torque-to-yield (TTY) head bolts designed to stretch slightly when installed, creating an elastic effect that adds to the clamping force of the fasteners. Since that stretch is permanent, you can’t reuse TTY bolts. If you do, they can stretch beyond their rated torque capacity and won’t tighten properly or fail outright.
- Check bolt lengths. Some cylinder heads use different length bolts for specific mounting locations. Verify you have the correct-length bolts for your application. It’s not unheard of to get the wrong or improper number of bolts.
- Use washers for aluminum heads. If you’ve got aluminum cylinder heads, be sure to use hardened steel washers under the head bolts to prevent galling the head surface and ensure even clamping on the soft aluminum. Most quality head bolt kits come with the required washers. Again, lubricate the underside of the head bolts and washers.
- Use a good torque wrench. We hope you’re a stickler for good work and don’t use a cheap torque wrench. It won’t give you accurate torque readings when tightening your head bolts. Be sure to use smooth motion—sudden or jerky movements can yield false torque readings.
- Follow the proper torque sequence and pattern. Always follow the recommended torque specifications and pattern. Torque down the bolts gradually in at least three steps to create more even clamping force.
- Remember to re-torque. Some gaskets require re-torquing the head bolts for proper gasket sealing. If your gasket manufacturer specifies re-torquing, run the engine until it reaches operating temperature, turn it off, and re-torque each bolt to specification while the engine is still warm. For engines with aluminum cylinder heads, it’s recommended you wait to re-torque the bolts until the engine has cooled down.
- Bleed the cooling system. According to Fel-Pro, localized hot spots are one of the main causes of head gasket failure. That’s why the company recommends bleeding the cooling system when installing new head gaskets. Any air pockets in the water jackets can heat up and cause the cylinder head to grow, which will flatten the head gasket’s combustion seal and cause it to fail.
This article is sponsored by Summit Racing Equipment. For more information, please visit www.summitracing.com.