 By Larry Bailly
Contributing Editor
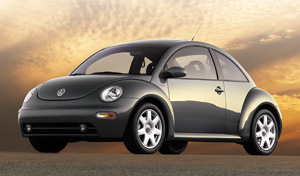
The body of the New Beetle is cute, and the flush mounting of the exterior lighting likely improves aerodynamics. But that mounting also creates problems as far as retaining the lights. There is a rotating, sliding, cam-locking piece of plastic that is retained in a plastic track that collects things like dirt, water, sand or anything else that can jamb two plastic parts and make them one. When everything is clean and dry, the headlight units come out using these procedures.
1. Locate the release tab and lock on the inner fender well; usually the left (battery) side, because that one has the least room.
2. Press down on the checkered release tab and lift the plastic lever. This will start the movement of the headlight unit forward, out of the fender.
3. Continue moving the release lever up until the headlamp is about 2” forward of the fender, then gently pull the headlamp unit forward from the body, disconnecting the wiring harness from the unit.
4. Release the cover from the back of the unit, release the wire bail from the bad lamp and change out the bulb. Inspect the wiring between the bulbs and the harness connector for any melted areas or melted terminals at the bulbs. Replace if necessary.
5. After reinstalling the back cover, inspect the mechanism for the headlight retainer in the body. Make sure the headlamp well is clean and dry, and put a small amount of silicone paste on areas where the locating guides and locking tabs engage the retainer. This will give you a better chance of getting the headlamp out again to reconnect the wiring harness if you forget.
6. If the headlamp is positioned properly in the guide channels, and the sliding lock ring is free, the headlamp will engage the lock tabs. Moving the lever down to its locked position will pull and fully seat the headlamp back into the body.
The taillights are much simpler. On early cars, bulb replacement requires removing some of the inner trunk panels, which may require replacing some of the plastic retainer clips. Once the panels are off, or the access covers are removed on later cars, you’ll notice that the taillights are held in with a wing nut assembly at the lower part of the light. The upper part of the housing is fitted into a slot in the fender. With the retaining nut off the bottom, the taillight comes out of the body for removal of the bulb holders and bulbs.


