It may seem like a long time ago when removing the wheel bearings was a normal part of every brake job. The wheel, hub and drum would be removed. The bearings and seal were removed and the old grease was cleaned from the bearings with solvent and a brush. You would next take a wad of grease in the palm of your hand and and work it into the bearing. If you were lucky, you had a bearing grease packer to make the job a little more bearable.
Many younger techs may have never experienced the unpleasantness of this job. But, as some vehicles like the Ford F150, Chevrolet Colorado and GMC Canyon find their way onto the aftermarket, bearing service could come back in fashion on vehicles instead of just on boat trailers.
Since serviceable wheel bearings are rare, they often fall victim to wives tales and urban legends. One of the most prevalent is the myth of spinning a bearing with compressed air. Proper service required the bearing cage and roller assembly not be spun with the compressed air as this would cause the ejection of the rollers from the cage and possibly cause an injury. The urban legend of the bearing seizing and tearing a finger off has yet to be proved as true.
Wheel Bearings
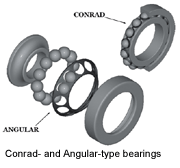
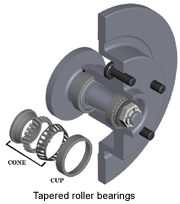
Wheel bearings can be of either ball or tapered roller type. The ball bearings used for front wheel bearing applications are an angular type. An angular-type ball bearing will accept greater thrust loads than a Conrad-type bearing, which will accept a 100 percent load in the radial or thrust position and any combination of a 100 percent load. A tapered roller bearing will accept both a radial and a thrust load. All wheel bearings come in sets.
The set consists of an inner and outer bearing. As is the case of a rear axle that uses a “C” clip to retain the axle to the ring gear carrier. The ring gear carrier bearings handle the thrust load and the straight roller at the flange end carries the radial load.
Some rear axles will have a cartridge-type wheel bearing set containing either ball or tapered roller set.
 Seals
Seals
Basic seal construction remains the same, consisting of a metal retainer and seal. The primary sealing materials have changed from felt to rubber products, ranging from Buna N to Fluoroelastomers, yet felt is still used as a dust shield for the primary seal. A seal is only as good as the surface it rides on. A seal needs the surface it rides on to be lubricated. If the seal lip runs on a dry surface, it will over heat and become brittle. A scratch or gouge can damage the sealing lip and cause the seal to fail. It is very important that the seal be lubricated before it is installed to prevent it from running dry. A small amount of grease on the back of the seal and a film on the spindle is recommended. Don’t force it by getting a bigger hammer. It is highly recommended that a seal installer be used. The installer will prevent the seal from being cocked when it is installed. A shaft protector should be used when installing a seal over a splined shaft. The dust cap is also a vital part of the sealing system. A little extra care and a brass drift can make the job a lot easier.
 Wheel Bearing Adjustment
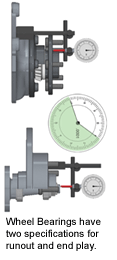
A wheel bearing out of adjustment can reduce bearing life and can affect more than just the bearing. It affects the operation and service life of the spindle, wheel seal and brake components. It is important to adjust the wheel bearing end play to the proper specifications. If the bearing set is adjusted too loose or too tight, it can cause the bearing to fail prematurely. In fact, a recent survey showed that more than half of the bearings on the road today are adjusted incorrectly. Bearing adjustment did not become critical to braking performance until the introduction of disc brakes. The caliper is mounted directly to the steering knuckle. If there was too much end play, it would cause piston knock back in the caliper, resulting is in excessive pedal travel. The use of direct mount of the caliper is returning to use on high-performance vehicles. The following procedure is one method for adjusting the end play of a wheel bearing set. Tighten the adjusting nut while turning the rotor or drum. When the effort to turn the rotor or drum increases, a preload is placed on bearing assembly and all raceway surfaces are in contact, providing no end play. Back off the nut one flat to allow insertion of the cotter key. The end play can be checked with a dial indicator. Mount the indicator with a magnetic or mechanical base as close to the center of the hub as possible. The indicator tip is set on a smooth surface at the end of the spindle. Push the rotor back and set the indicator to zero. Then pull the rotor or drum out and read the dial indicator. Allow 0.004 inch (0.100mm) ± 0.003 inch (0.076 mm) end play. Then lock the nut with a new cotter pin. Whether you are checking a conventional wheel bearing or hub bearing, the best tool for checking adjustment is a dial indicator. Many four-wheel-drive vehicles and most trucks with a load rating of one ton and higher, use a full floating axle. The axle has a bearing set, spindle and hub. The same adjustment procedure can be used for these applications.
 Hub Bearings
In the late 1970s, the hub bearing began to appear on front-wheel-drive vehicles. This was a sealed, lubricated for life, pre-adjusted bearing with a mounting flange attached to the strut knuckle or rear axle flange and a hub for the rotor, wheel and CV joint. Other versions consist of a hub and bearing set that mount on a rear axle spindle or steering knuckle. The bearing could be either ball or roller type. Passenger car and light truck hub bearings are not adjustable. The hub is directly affected by the condition of the bearing. The driver may first notice a noise coming from the wheel of the vehicle when the steering wheel is turned. There will be noticeable end play when the wheel is unloaded. A check using a dial indicator will show an end play greater than 0.004 inch (0.100mm). Bearing end play can also affect a wheel speed sensor and cause an intermittent ABS trouble code. If the bearing flange has a runout, that runout will be magnified at the rotor friction surface. A runout of 0.0005 inch (0.00254mm) at the bearing flange could result in a 0.001 inch (0.0025mm) runout at the rotor friction surface.
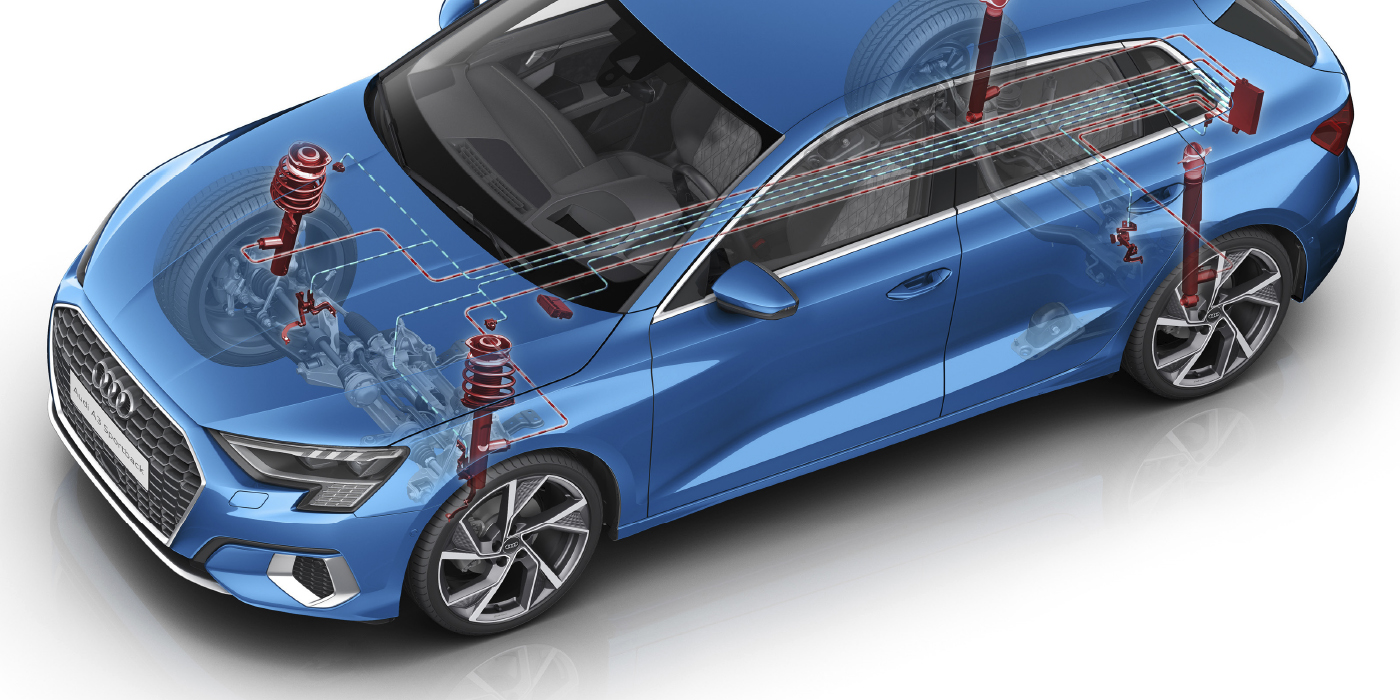
A wheel bearing is the most critical component of a braking system. It positions the wheel and rotor to the caliper, the wheel and drum to the backing plate, and controls the input to the wheel speed sensor. As Electronic Stability Control (ESC) braking systems become more complex, the wheel bearing will still be the central component to the system’s operation. With the introduction of the Electronic Wedge Brake (EWB) just around the corner the caliper, wheel speed sensor and chassis controller will become the ABS system. These changes will require greater care in the servicing of the total suspension system.
INSTALLATION TIPS: Tools
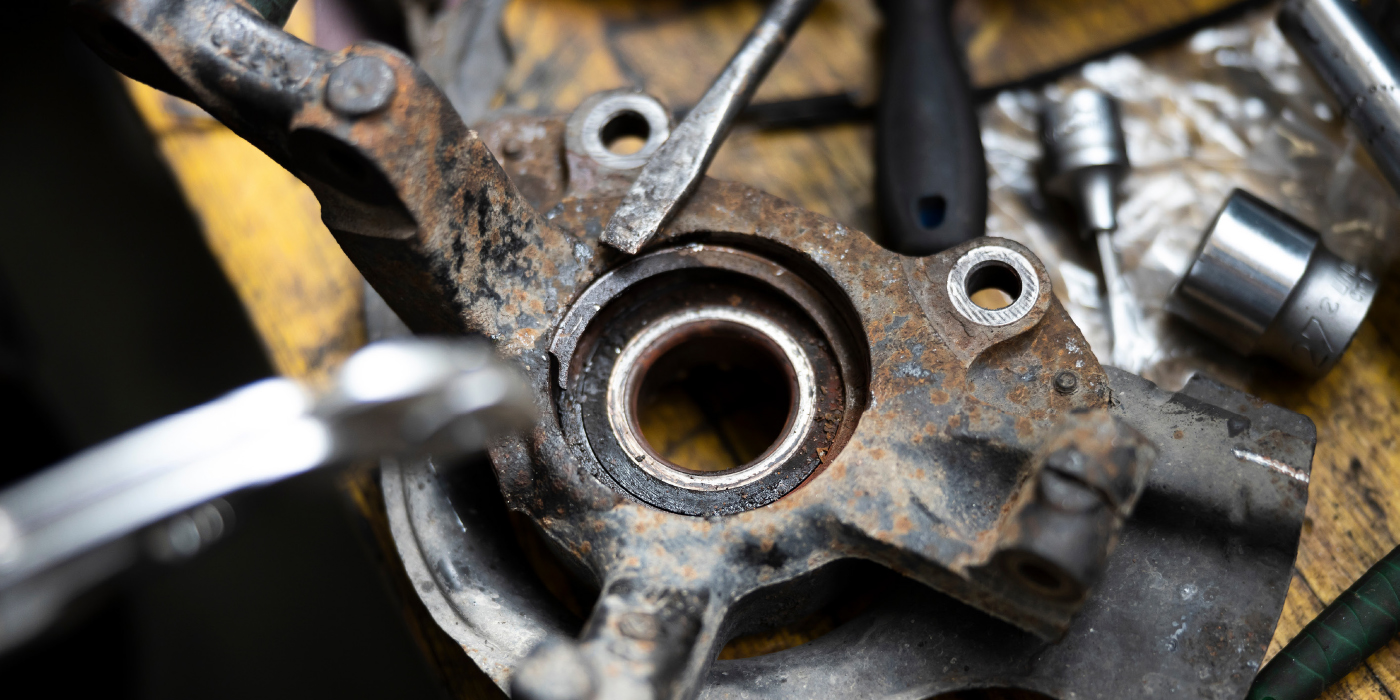
To avoid damaging the new bearing, the bearing inner race must be carefully pressed onto a shaft and the outer race pressed into its bore. Hammering a bearing in place can result in the rollers or balls dimpling the bearing races and causing premature failure.
Most bearings have about 0.001” of interference-fit built into an axle shaft or bearing bore, which means that these types of bearings must be pressed or driven into place. Tapered bearing cups or outer races should be driven in place using a special aluminum driver. In an emergency, an old bearing race cut through on one side with an air-powered “whiz wheel” will serve the purpose.
Special tools are also available for pressing bearings into a steering knuckle. Installation of bearings into an aluminum steering knuckle or housing can be expedited by using an electric hot air gun to gradually expand the housing without melting or distorting the metal. Lastly, always adjust a tapered roller bearing by torquing to 15-20 ft.-lbs. and spinning the hub to center the rollers in the races. Back this initial adjustment off an 1/8 or 1/4 turn and retorque the bearing to manufacturers’ specifications. A typical final torque of 20-30 inch-pounds will leave zero end play and a slight amount of preload on the wheel bearing assembly.
Whether installing a ball, roller or sealed bearing assembly, using correct procedures and tools will ensure a comeback-free wheel bearing installation.