By Rich Diegle
Your shop just installed a new set of tires on a 2002 Cadillac Escalade. The very next day, the customer returns complaining about a squeak and a rattle coming from the front end that wasn’t there before you replaced the tires. What happened?
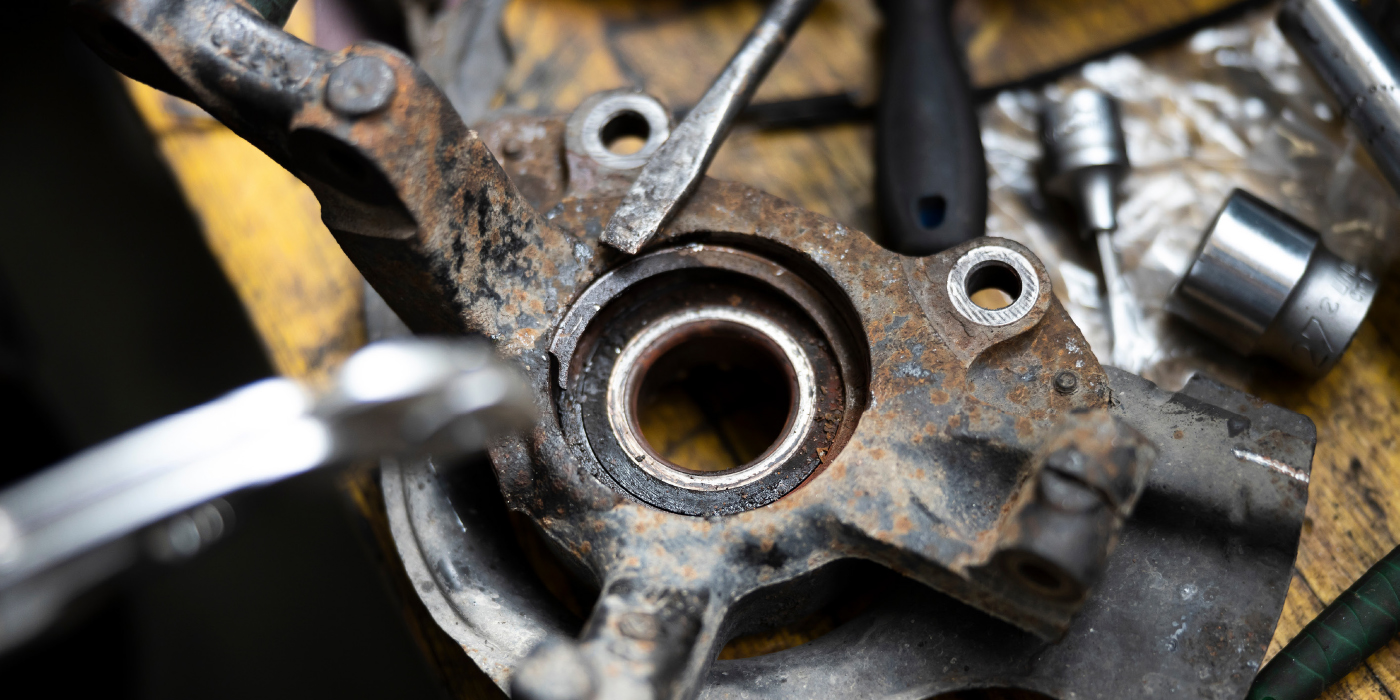
The noise could be coming from the front shocks. The shocks are equipped with upper insulator pilot rings that can wear prematurely. When the pilot rings wear out, the shocks can become misaligned in their insulators and cause a squeak or rattle. Since the front shocks provide the only stop for the suspension when it’s fully extended, the weight of the hanging suspension while the vehicle was on the rack for the tire replacement could have exaggerated the shocks’ misalignment in their insulators.
To repair the problem, replace the lower portion of the upper shock insulator assemblies and the plastic pilot rings (GM P/N 22175818) using the repair procedure below.
NOTE: The new insulators include new plastic pilot rings.
Other Models Affected:
2002-2003 Cadillac Escalade EXT and ESV
2000-2003 Chevrolet Silverado, Suburban, Tahoe and Avalanche
2000-2003 GMC Sierra, Yukon and Yukon XL
 Repair Procedure
(Review safety procedures contained in the ALLDATA system before beginning.)
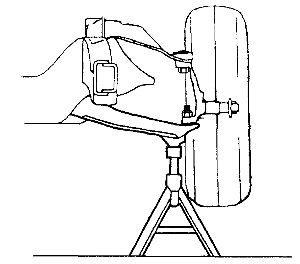
1. Raise and support the vehicle.
CAUTION: The front shocks provide the only stop to the front suspension when fully extended, so support the lower control arm with a suitable jack stand.
2. Remove one of the front shock absorbers.
3. Remove the lower portion of the upper insulator (3) and pilot ring (2) from the shock and discard them.
4. Install the new pilot ring and the new lower portion of the upper insulator onto the shock. Insert the shock stem through the hole in the upper shock bracket. Install the upper insulator (1) and nut. Do not tighten the nut completely.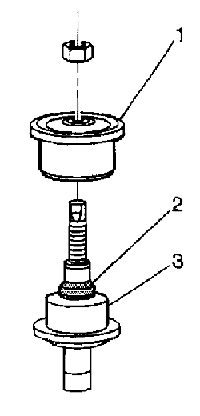 NOTE: The upper insulators are substantially larger than the lower insulators. Use the new plastic pilot ring to assist in the alignment of the insulators.
5. Align the shock with the mounting holes in the lower control arm and install the through-bolt and nut. Tighten the nut to 59 ft. lbs. (80 Nm).
6. Remove the jack stand and lower the vehicle to the ground. Hold the upper shock stem by the wrench flats and tighten the top nut to 15 ft. lbs. (20 Nm).
7. Duplicate the repair procedure for the other front shock.
Cadillac, Escalade, Escalade EXT, Escalade ESV, Chevrolet Silverado, Suburban, Tahoe and Avalanche, GMC Sierra, Yukon and Yukon XL are registered trademark names and model designations of the General Motors Corporation and are being used solely for reference and application purposes.
For additional information on ALLDATA, visit www.alldata.com.
Rich Diegle is technical editor at ALLDATA. Diegle is an Advanced Engine Performance Certified ASE Master Technician with an AA degree in automotive technology and 23 years of dealership and independent shop experience.