Proper Procedures for Removing and Reinstalling a Drive Shaft (VIDEO)

Proper Procedures for Removing and Reinstalling a Drive Shaft

Joe Keene covers the proper way to remove and reinstall a driveshaft. This video is sponsored by TrakMotive.

CC:

When removing the driveshaft, you must first raise a vehicle up using a lift or floor jack and jack stands. If the rear driveshaft is being removed and the rear of the vehicle is being jacked up, it is very important to chalk the front wheels, so the vehicle cannot roll off the jack stands should it be bumped or otherwise shifted. When a driveshaft is removed, the vehicle will no longer be in park and can roll because a link between the drive wheels and transmission is removed. Mark the driveshaft orientation before beginning. Marking the driveshaft for removal is a good idea if the original driveshaft is to be reinstalled. But when replacing, it’s not needed. This will help return the driveshaft to its original position on the differential, which can help avoid drive line vibrations once the driveshaft is reinstalled.

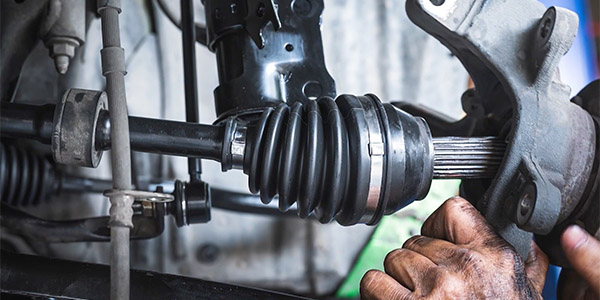
First, remove the shaft differential flange mounting bolts. These bolts will be very tight. So use quality tools to avoid stripping. Also, these bolts may use Threadlocker to avoid coming loose while in operation, which needs to be reapplied when reinstalling. Using a plastic hammer, gently shock the driveshaft loose from the differential flange by striking the rear yoke, the U-joint mount. At this point, the back half of the shaft will be free. So hang onto it. On some vehicles, there will be a center support which must be undone by removing the two center support mounting bolts. When removing the driveshaft, use both hands and gently slide the driveshaft from the transmission or transfer case. A small amount of fluid might leak out, so have that fluid catch basin ready. At this point, the U-joint at either end of the shaft should be checked.

Firmly grab the yoke and move it in all directions. It should be a smooth motion with no rough spots or play in any direction. Before reinstalling the driveshaft, apply a small amount of grease to the yoke. This will help lubricate the output shaft seal in the transmission or transfer case. There is a dust boot along with the rear seal, which is incorporated within the transmission or transfer case tail housing seal. Be careful reinstalling the driveshaft yoke, so you do not damage the seal. Gently guide the yoke into place over and onto the output shaft. Once the front yoke is installed, pull the driveshaft back into place while inserting mounting bolts by hand to avoid cross-threading. Finish installing the mounting bolts while making sure the alignment marks are together. Tighten the bolts evenly and in a cross pattern to factory specifications. If any fluid was lost during the job, check and refill the transmission or transfer case after the shaft has been installed. And you are all set. Thanks for watching.

This video is sponsored by TrakMotive.

You May Also Like

Selecting the Right Oil for your Customers Engine

Learn how to educate customers on the importance of OEM specifications and premium lubrication for their vehicles’ maintenance needs.

Of all the services your shop offers. The simple oil change is often the most contentious. No matter what they drive, your customers may think that oil is oil. If it pours out of a bottle they recognize on the shelf in their father's garage or an ad-on tv, it's good enough for their car. The fact is the belief that they're all the same can be shortsighted at best and detrimental to the life of the engine. At worst, modern engines are built to tighter tolerances, and as a result, they rely on specific oil pressures for maximum fuel economy or to support vital systems such as variable valve timing substituting a non recommended viscosity engine Oil can negatively affect fuel economy and emissions, and may actually accelerate wear on critical components. According to the American Petroleum Institute, there are five different groups of base oils used to make today's motor oils based on the refining methods and the properties of the oil.

At the Intersection of Tradition and Innovation with Grace Hovis

Grace Hovis’s journey in Hovis Auto & Truck Supply blends tradition with digital innovation in the automotive aftermarket industry.

Matching OE Torque Specs When Reinstalling Is Important

Explore the key reasons as to why adhering to OE torque specs is crucial. This video is sponsored by TrakMotive.

Turbocharger Maintenance ft. Rein TechSelect Turbo Kits

Learn about common challenges with turbocharger maintenance and how Rein TechSelect Turbo Kitsmake the repair process easier for technicians.

The Standard® Advantage

Standard® knows that what comes out of a repair is directly dependent upon what goes into the box. This video is sponsored by Standard®.

Other Posts

Tesla Model 3 TPMS Service

Resetting and programming TPMS sensors for a Tesla is a lot like any other vehicle, and the challenge is still the same: keeping the light off.

Can You Jumpstart an EV?

First thing’s first: Find the LV battery, which could be anywhere in the vehicle.

Understanding What Antifreeze/Coolant Actually Does

Today, each manufacturer has its own formula for best results in their vehicles. This video is part of the Group Training Academy.

How The Vehicle Cooling System Functions

Here’s what to know to clarify cooling questions you’re asked at the service counter. This video is part of The Group Training Academy.