Models: 2006-’07 Honda Civic with automatic transmission
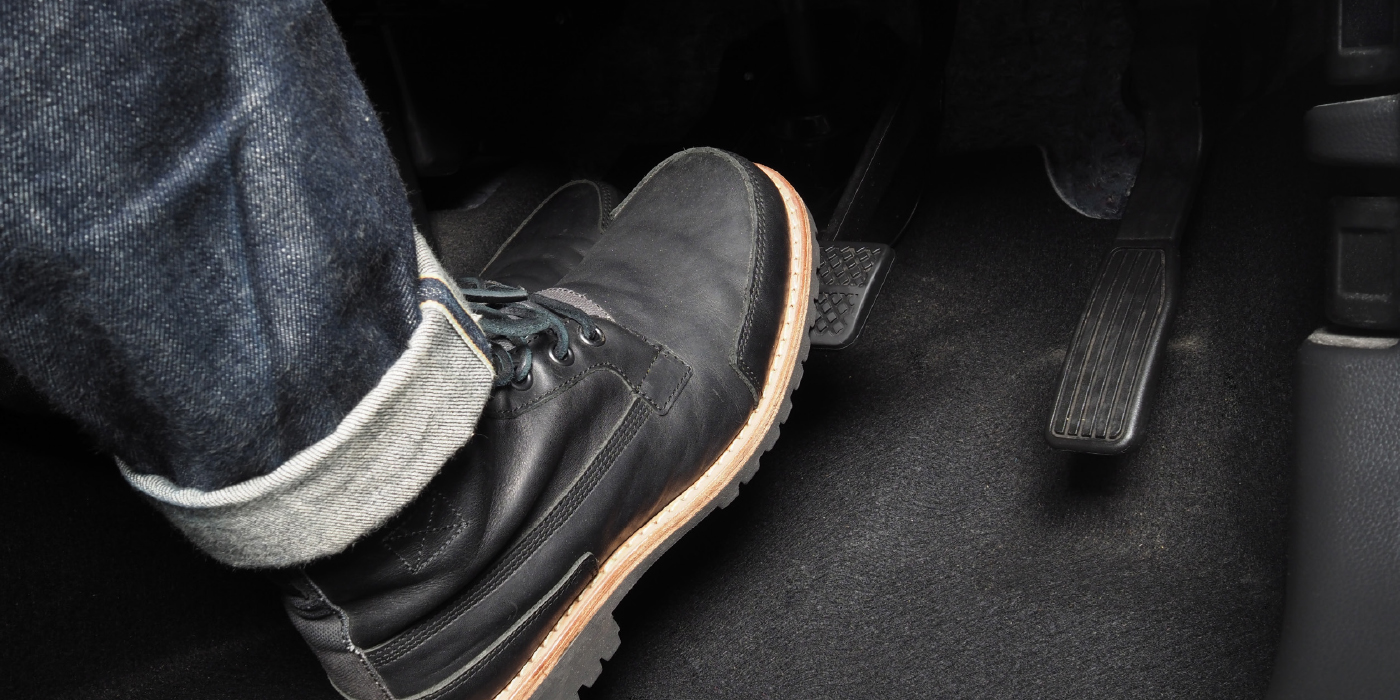
Symptom: The brake pedal can feel hard during the first couple of brake applications, usually in the morning when the ambient temperature is cold.
Probable Cause: At cold start, in high altitude, combined with the fast idle retard operation, the intake manifold vacuum supply is at its lowest, resulting in low booster assist.
Corrective Action: Replace the brake booster and the master cylinder rod seal, and update the PGM-FI software using the reflash capable scan tool.
Repair Procedure
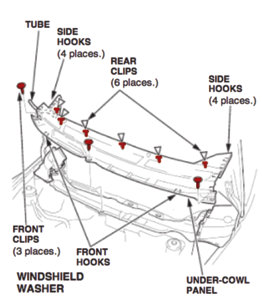
1. Position the wiper blades in the upright position to keep them from interfering with the cowl cover.
2. Remove the center cowl cover:
a. Remove the three clips.
b. Release the three front hooks from the edge of the under-cowl panel.
c. Detach the clips by carefully pulling the cover up, then remove the cover by releasing the side hooks. See Fig. 1.
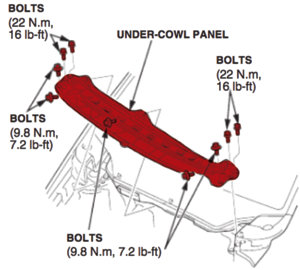
3. Remove the under-cowl panel. See Fig. 2.
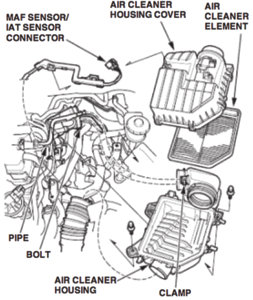
4. Remove the top half of the air cleaner housing and the air cleaner element to gain access to the clamp. See Fig. 3.
5. Loosen all of the clamps attached to the air cleaner housing and remove the bottom half of the housing.
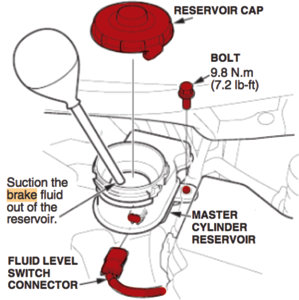
6. Disconnect the brake fluid levels switch connector. See Fig. 4.
7. Remove the master cylinder reservoir mounting bolt.
8. Remove the brake fluid from the master cylinder reservoir with a syringe.
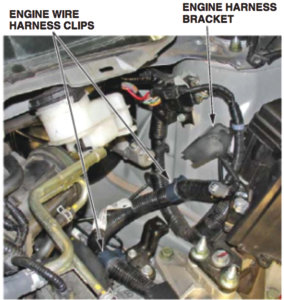
9. Remove the two engine wire harness clips from their brackets. See Fig. 5.
10. Remove the smaller engine harness bracket located underneath the master cylinder reservoir bracket (one 6 mm bolt).
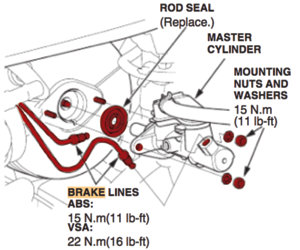
11. Disconnect the brake lines from the master cylinder. See Fig. 6.
NOTE: To prevent spills, cover the hose joints with shop towels.
12. Remove the master cylinder mounting nuts and washers.
13. Remove the master cylinder and reservoir together from the brake booster.
NOTE: Be careful to not bend or damage the brake lines when removing the master cylinder.
14. Remove the brake booster. For additional guidance, refer to page 19-27 of the 2006-’08 Civic Service Manual or go online and enter keyword “booster” and select “Brake Booster Replacement (R18A1 and R18A4 Engine)” from the list.
15. Install the new brake booster in the reverse order of removal.
16. Install a new rod seal on the master cylinder.
17. Install the master cylinder and reservoir on the brake booster in the reverse order of removal.
18. Check the brake pedal height and free play after installing the master cylinder and adjust it if needed. Refer to page 19-6 of the service manual or go online and enter keyword “pedal adjustment” and select “Brake Pedal and Brake Pedal Position Switch Adjustment” from the list.
19. Fill the reservoir with brake fluid and bleed the brake system.
20. Install all removed parts.
21. Update the PGM-FI software with reflash capable scan tool. Refer to Service Bulletin 01-023, Updating Control Units/Modules.
Courtesy of MotoLOGIC® Repair &
Diagnostics: www.motoshop.com/motologic