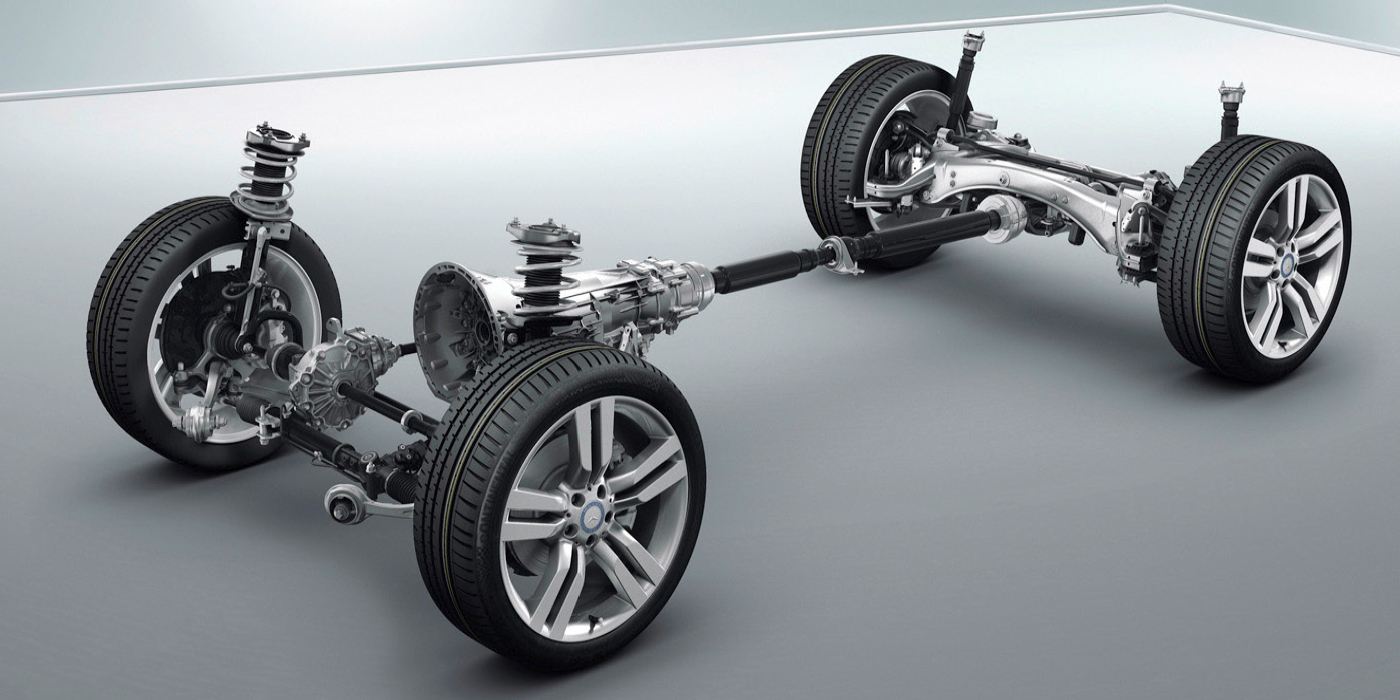
 The Prius is based on the Toyota Echo and uses other suspension parts from vehicles we do not see in North America. The front suspension is the conventional MacPherson strut arrangement with rack and pinion steering. The rear suspension is a trailing arm solid beam axle.
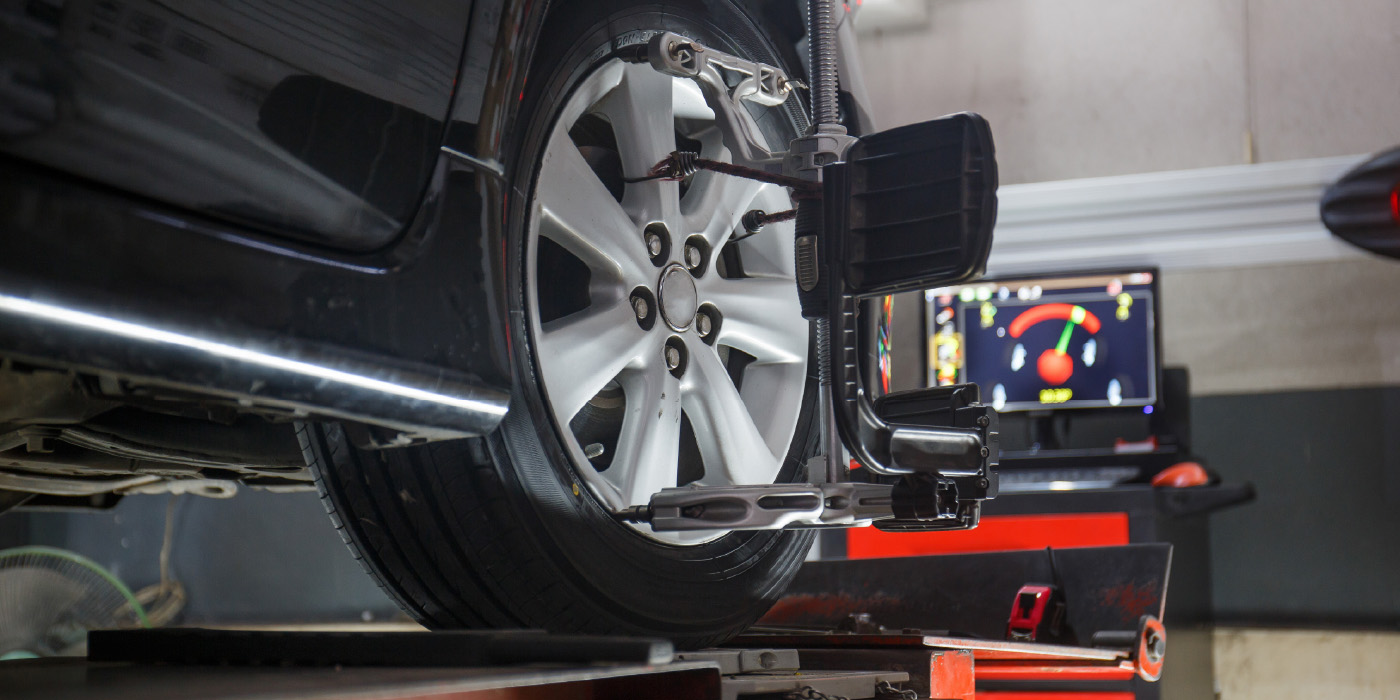
Alignments are just the same as any vehicle and no special tools are required except knowledge and information.
Recalls
In 2006, Toyota performed a voluntary recall on 2004-2006 models manufactured between July 2003 and December 2005 to replace the steering intermediate shaft. The fault lies in a steering shaft, which Toyota says could crack if the steering wheel is turned forcefully or if the car is driven onto the curbing while parking. To check if the recall was performed on a vehicle go to www.toyota.com/recall/.
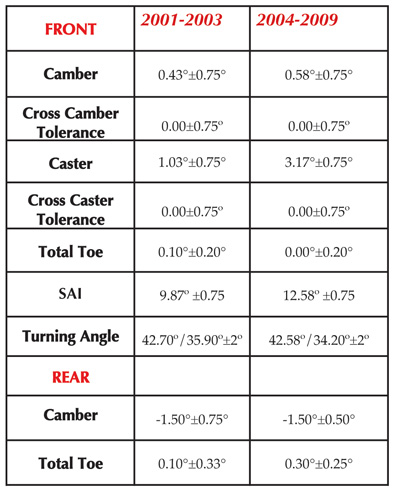
Front Suspension
The front suspension is a simple strut-type suspension. Caster is not adjustable. Camber is not factory adjustable. Additional parts and kits are required to make a camber adjustment. If the cross-caster or cross-camber angles have a difference that is greater than .75º, inspect the control arms, struts and knuckles for damage.
If toe adjustments are made, it is critical to calibrate the steering position and yaw rate sensors.
Rear Suspension
The trailing arm beam axle in the rear is as simple as is gets for a vehicle. The axle is non-adjustable from the factory, but shims can be installed between the axle flange and wheel bearings.
Most Prii came with HID headlights. This system has an sensor with an arm connected to the rear axle that determines the angle of the headlights so that other drivers are not blinded. The linkage can become damaged due to road debris. Also, make sure the ride height is inspected.
Steering
All Prius models have electric power steering. The unit operates on the 12 volt electrical system and not the Hybrid power system. The system has a “P/S” malfunction light on the dash. Based on signals from the power steering torque sensor, vehicle speed sensor, and the skid control ECU, the power steering ECU calculates the current flow needed to control the power steering motor.
To address any power steering issue, having service information is critical to making a diagnosis or repair. But, the system diagnostics are the same for any vehicle with electric power steering.
Zero Point Calibration
Some Prius models are equipped with an optional Vehicle Stability Control (VSC) system that requires a scan tool and special procedure to perform a zero point calibration of the yaw rate, deceleration and steering angle sensor. Yes, it is possible to reset the system by jumping two pins in the diagnostic connector and disconnecting the battery, but there is no way to confirm or document the calibration was properly performed.
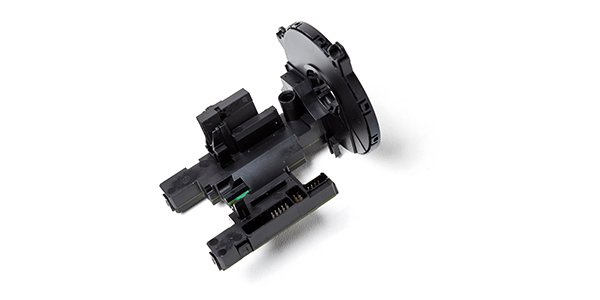
The steering position sensor’s basic function is to monitor the driver’s steering inputs. This includes the angle of the steering wheel and/or the rate at which the driver is turning the wheel. The steering position sensor on the Prius is located behind the steering wheel and is a high-resolution sensor.
The VSC system relies on accurate steering input from the steering angle sensor to analyze a situation and apply appropriate measures to help direct the vehicle on the intended path. If the system if not calibrated after a toe adjustment, the system will not operate properly and may illuminate the VSC malfunction light after the driver has picked up their Prius.
The Toyota VSC system uses the information from the steering position sensor and compares the information to the yaw rate sensor to determine what the car is doing. A yaw rate sensor is a gyroscopic device that measures a vehicle’s angular velocity around its vertical axis. On the Prius, the yaw rate senor is located under the center console bolted to the floor pan and is inline with the centerline of the vehicle. The sensor measures the difference between the vehicle’s centerline and vehicle actual movement direction. This is called slip angle.
When a vehicle is aligned and the toe in the front or rear is altered, it changes the thrust angle of the vehicle. The thrust angle is directly connected with the slip angle and the measurements taken by the yaw position sensor. Even if you adjust only the rear toe, you are altering the thrust angle and the steering position sensor must be calibrated. Why? The rear toe adjustment brought the thrust angle and center line into specification. The steering position sensor information has changed and so has the information from the yaw position sensor due to the change in the thrust angle and slip angle that the yaw position sensor measures.
If the error is large enough, it will disable the system and turn the system’s malfunction indicator light on to alert the driver. If the error is small, it will operate as normal until certain conditions occur like driving on freeway ramps and tight streets. Under these conditions, the computer might unnecessarily activate the stability control system slowing the vehicle or even fail to respond with the right corrective action causing the vehicle to leave the road.
Toyota recommends disconnecting the cable from the negative battery terminal for more than two seconds before starting the yaw rate sensor and deceleration sensor recalibration procedure. This resets the steering angle sensor zero point. Before disconnecting the battery, make sure to write down the radio presets. Most scan and alignment tools that can interface with the vehicle will prompt you through the re-calibration procedure.
After you are done, you will also have to re-initialize all applicable systems available on the vehicle like power windows and sunroof. To re-initialize the windows, open the window and close the power window by holding the Auto UP knob ON. Continue to hold the Auto UP knob ON a minimum of one second after the power window completely closes. For the sunroof, press and hold the TILT UP switch until the roof glass tilts upward fully (the roof glass automatically tilts downward slightly after fully tilting upward).
Hunter’s CodeLink tool which is programmed to address all of the OEM’s requirements relative to the VSC and electric steering reset process. Hunter has simplified the process with a seamless transition from the final front toe adjustment to the required reset of the components associated with the electronic steering and VSC system. Simple instructions guide the technician through disconnecting the battery at the correct time and for the correct duration. Easy to follow instructions on how to re-initialize windows, sunroofs, etc are supplied after the rest process is complete. This tool is dedicated to the Hunter Alignment System.
TPMS Reset
The direct TPMS system for Toyota vehicles uses a button labeled “SET” below the steering column or in the glove box to reset the system. When you press the button, the system is looking for the sensor IDs that are already stored in the memory.
This button is not a magic button saving you from purchasing a TPMS tools and training. In fact, this button can get you into even more trouble if you do not know what you are doing.
Reset Procedure
1.Park the vehicle in a safe place and turn the ignition switch to the “LOCK” position.
2. Adjust the pressure of all installed tires to the specified cold tire inflation pressure level.
3. Turn the ignition key to the “ON” position.
4. Push and hold the tire pressure warning reset switch until the tire pressure warning light blinks slowly three times.
5. Leave the system for a few minutes with the ignition switch in “ON” position, and then turn the ignition key to the “LOCK” position.
Typically, systems use a light on the dash and do not display individual pressures (some 2010 models display pressures in the drive information). When the vehicle is started, the light should illuminate for three seconds and go out if the system is functioning normally. If the light stays on, it means that the system has detected a low tire. The inflation of all the tires (sometimes including the spare) should be checked.
If the light flashes for one minute after the ignition is turned on or continues to flash, it is a sign the system has a malfunction that needs to be diagnosed. On some models, the frequency and length of the flashes can be used to diagnosis a problem.
Aftermarket Adjustments
Fortunately for the alignment technician, the first generation Toyota Prius only requires the most common and relatively inexpensive aftermarket alignment parts. The front standard MacPherson strut suspension used on these vehicles can be adjusted for camber by using one of Specialty Products EZCam XR camber bolts.
These parts can be installed and adjusted without grinding or modifying the strut or knuckle. Simply remove the upper of the two bolts holding the strut to the knuckle and install the part number 81270 EZCam XR bolt. After loosening the lower bolt, camber can now be adjusted positive or negative approximately 1.5°.
The different part numbers of the EZCam XR work the same, but are different sizes depending on what size of bolt is used on the vehicle. A quick check of application can be done with an open-end metric wrench.
The rear suspension also uses one of the most common types of alignment kits, the 75800 dual angle full contact EZ Shim. This shim, and many other types of shims, have been used extensively on all types of torsion beam trailing axles.
The EZ Shim is capable of correcting rear camber and toe problems up to 1.5°. Most alignment equipment has a program that can help the alignment technician set up the proper number combination needed to adjust rear alignment angles to proper specifications.
The shim can also be set up manually using the enclosed instruction sheet that includes specific directions and cut. n
Douglas Hardy
Technical Trainer/Designer
Specialty Products Company
www.specprod.com