by Eric Seifert
ALLDATA Technical Editor
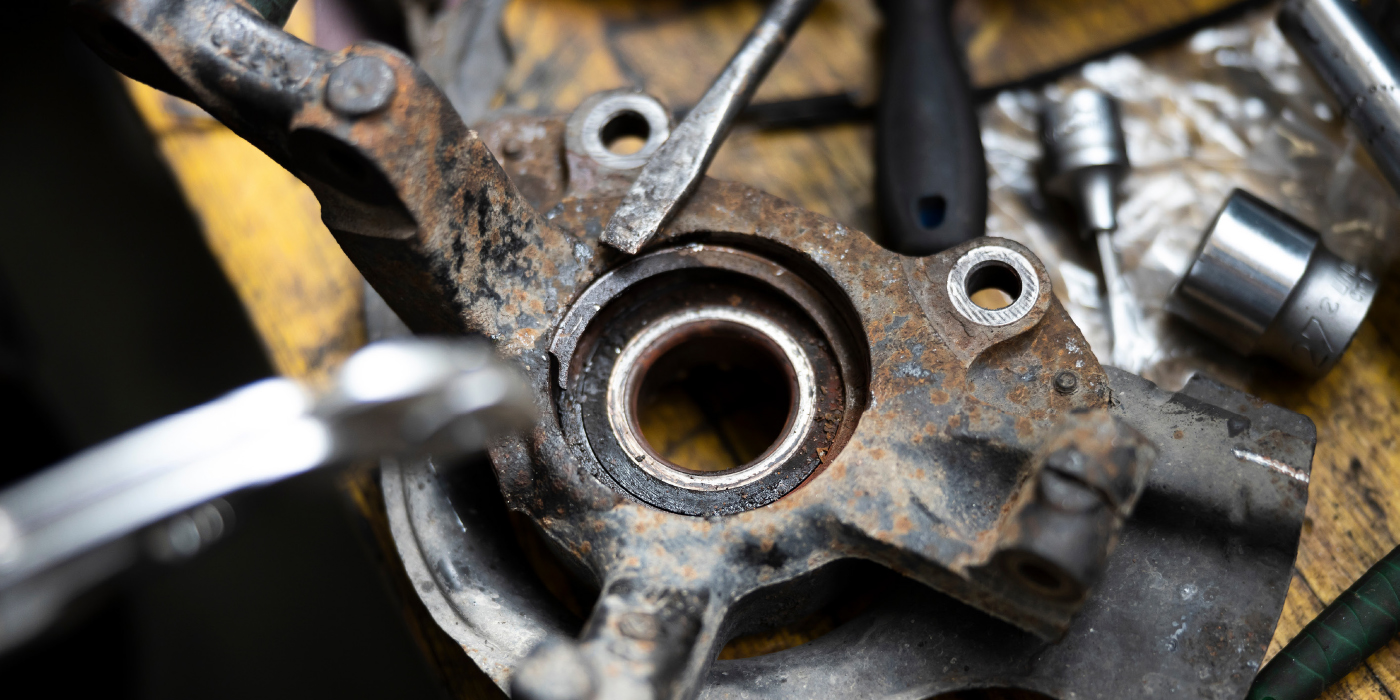
Chris takes his kids to school in the family’s 2002 Acura MDX during the week. His wife uses the Acura to shuttle them to track meets on weekends. Recently, they both noticed that the car makes a “clunk” noise as it’s shifted from park to reverse. After performing a quick diagnostic routine, we were able to determine the source of the clunk.
If there is a vibration at idle or harsh engagement when shifting the transmission between Park, Drive and Reverse, the front hydraulic engine mount may have deteriorated and torn.
1. Bring the engine up to operating temperature and fully apply the parking brake.
2. For manual-transmission-equipped vehicles:
Have an assistant stand to the side of the engine compartment to watch the top of the front engine mount. With the engine running at 2,000 rpm, slowly engage the clutch. Your assistant should be looking for contact between the top of the engine mount and the bottom of the engine mount bracket, and listening for noise from that area.
3. For automatic-transmission-equipped vehicles:
Have an assistant stand to the side of the engine compartment within view of the top of the front engine mount. Shift the transmission to Drive. With your foot firmly on the brake pedal, quickly depress the accelerator pedal and release it. Your assistant should be looking for contact between the top of the engine mount and the bottom of the engine mount bracket, and listening for noise from that area.
4. If there is contact and/or noise, perform the repair procedure.
If the mount is damaged, it will need to be replaced with one of the following Acura part numbers:
• 2001-’02 MDX — P/N 50800-S3V-A82
• 2003-’04 MDX — P/N 50800-S3V-A03
• 1999 3.2 TL — P/N 50810-S87-A82
• 2000-’03 3.2 TL — P/N 50800-S0K-A82
• 2001-’03 3.2 CL — P/N 50800-S0K-A82
Applicable Vehicles:
2000-’03 3.2 TL – ALL
2001-’03 3.2 CL – ALL
2001-’03 MDX – ALL
2004 MDX – From VIN 2HNYD1…4H500001 through 2HNYD1…4H557556
Repair Procedure:
Note: Review the safety procedures in the ALLDATA system before beginning.
1. Place the vehicle on a lift, but do not raise it.
2. Remove the top nut from the front hydraulic engine mount. See Fig. 1.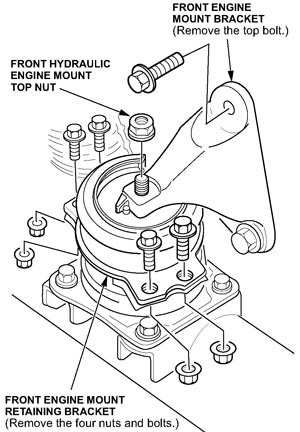
3. Remove the top bolt from the front engine mount bracket. See Fig. 1.
4. Remove the four nuts and bolts that secure the front engine mount retaining bracket. See Fig. 1.
5. Remove the three accessible bolts holding the engine mount to the subframe.
6. Raise the vehicle. Place a screw jack under the transmission next to the engine and raise the transmission slightly. See Fig. 2.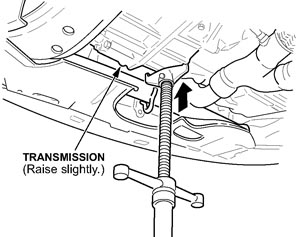
7. Remove the two remaining front bracket bolts.
8. Disconnect the engine mount vacuum line, and remove the last engine mount bolt.
9. Lower and remove the screw jack, then lower the vehicle.
10. Place a floor jack where the screw jack was, and raise the transmission until the bracket clears the engine mount stud.
11. Remove the front bracket and the engine mount.
12. Remove the four nuts and bolts holding the retaining bracket to the new engine mount, and remove the retaining bracket.
13. Position the engine mount on the subframe. Install the engine mount bolts loosely.
14. Install the retaining bracket on the engine mount.
15. Install the front bracket and the passenger-side bracket bolt, threading it halfway in. See Fig. 3.
16. Torque all four engine mount bolts to 34 Nm (25 lb-ft).
17. Reconnect the vacuum line.
18. Lower the transmission, and remove the floor jack. Install the four retaining bracket nuts and bolts, and torque them to 22 Nm (16 lb.-ft.). See Fig. 3.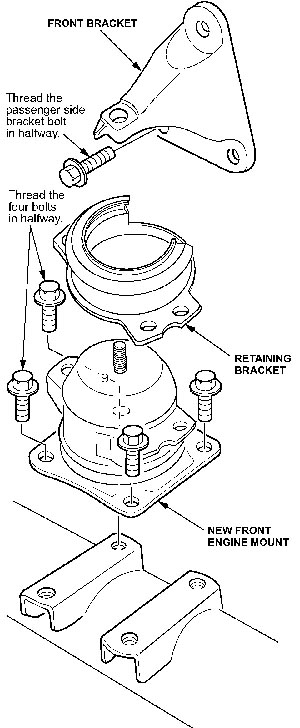
19. Install the remaining two bolts to the front bracket, and torque them to 38 Nm (28 lb.-ft.).
20. Install and torque the top engine mount nut to 54 Nm (40 lb.-ft.).
ALLDATA Technical Editor Eric Seifert is an ASE certified Master Technician and Engine Machinist. He is a graduate of the De Anza College Automotive Technology Program, with 20 years of independent shop and parts store experience.
For additional tech tips, visit www.alldata.com.
Technical service bulletin courtesy of ALLDATA.